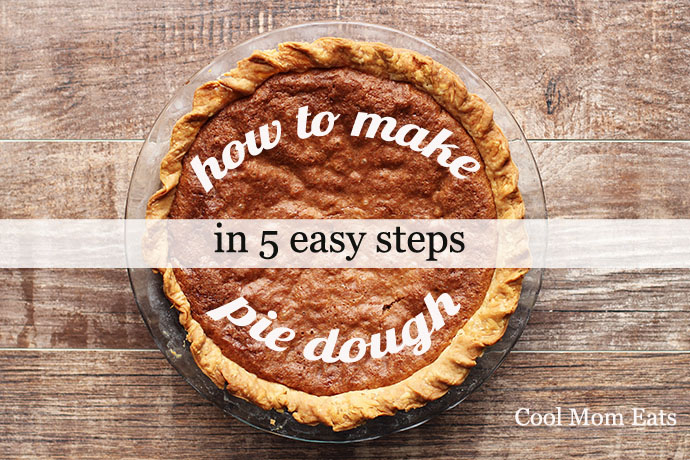
Homemade pie crust: Three simple words that strike fear into the hearts of many home cooks, including myself until 2 weeks ago. I must confess that I have always been a firm believer in store-bought pie crusts. They are easy and taste, well, good enough. Plus, I simply didn’t know how to make pie dough from scratch and had never taken the time to try. Until recently.
Three days before Thanksgiving, I had the chance to interview writer and pie expert, Kate Lebo, on my This Week for Dinner podcast. After spending an hour on the phone with Kate, I was determined to make my own pie crusts—and now I can’t stop. I have made 6 pies in the last 2 weeks. And, yes, our family of 5 ate them all, because homemade crust makes pies so much more delicious. I get it now and figure that if I can get hooked on making homemade pie dough, you can, too.
Here’s how in 5 easy steps, plus Kate’s all-butter pie crust recipe, which we are sharing below. (Thanks, Kate!)
Related: 10 best holiday pies: 5 classic recipes, plus 5 unexpected twists on them.

A few things before we jump in: I want to assure you that making homemade pie dough is not hard. The trick is to work quickly and with cold ingredients. If you remember those two things, you’re as golden as a perfectly baked pie crust. (Ha!)
We share an all-butter crust here because it’s our favorite. You can, of course, use shortening, but it tends to be more finicky than butter. And, while shortening makes for flaky crust, it doesn’t taste as good as butter. If you really want to use shortening, we recommend using half butter, half shortening.
Lastly, though the recipe we share here calls for mixing the dough by hand, the food processor is a nice alternative for mixing pie dough. It allows you to work quickly and not overhandle the dough, though you need to be careful not to over mix or add too much liquid. If you want to try your hand at using the food processor, check out these tips for pie dough in a food processor at Epicurious.
Related: How to store baked goods, from cakes to pie, so that they taste great even 3 days later.

Step 1: Chill your dough.
Once you’ve made your pie dough (see recipe below), it needs to chill before you roll out the crust. Quickly form the dough into a thick, falt disc, handling the dough as little as possible. Wrap the disc tightly in plastic wrap and put it in the fridge. The dough should chill for at least 1 hour before rolling, but can stay in the fridge for up to 3 days. If you want to make your dough way ahead of time, you can freeze it at this point.


Step 2: Roll out the crust.
Once your dough has chilled, it’s time to roll out the crust. Here are some tips to make the process a success:
- Place the disc of pie dough on a well-floured surface.
- Work fast: You want to roll out the dough only once so that the butter in your crust doesn’t melt and spread.
- Start by beating the disc down with a floured rolling pin a few times to flatten it out. Then, once flattened out a bit, re-flour the surface under the crust.
- Roll away from your body and turn the crust clockwise as you go to keep it even.
- Keep rolling until you end up with a round of dough that’s 12-14 inches in diameter.

Step 3: Transfer the pie crust to your pie plate.
To get a rolled out crust from your work surface into the pie plate, fold it in half before lifting it. Then, place the crust on the pie dish, with the fold down the middle, unfold, and press it into the dish.
I’ve seen advice that recommends folding the crust into quarters or rolling it onto the rolling pin then unrolling it on the dish, but I find a simple fold in half works just as well and is easiest.

Step 4: Prep the edge.
Before you get fancy (or simply crimp) the edge of your pie crust, prep it by cutting the overhand with kitchen shears. After that, crimp your edges! Better Homes & Gardens offers great ideas for how to make a special edge on your pie crust that are worth checking out. I like to go with the simple rope edge, though, where you just pinch the crust at an angle. Easy and pretty!

Step 5: Freeze the crust—just a little—one last time.
It’s almost time to make your pie or to store your crust for later use but, first, pop the pie dish with your pie crust into the freezer for 30 minutes or, if you plan on storing it in the freezer for later use, until the dough is completely frozen.

After a final chill in the freezer, it’s time to choose your own pie adventure! If you’re making a custard pie or a pie where you don’t cook the filling, you will need to blind bake the crust. Our friends at The Kitchn have a great tutorial on blind baking. If you’re making a pie that does not need a blind-baked crust, remove your pie dish from the freezer, fill the cold crust, and bake as directed by your recipe.
If you want to store your pie crust for later, slide the completely frozen crust out of the dish (it should come out no problem), wrap it well in plastic, and slip it into a large zip-top bag for storage. When you’re ready to make a pie, simply place the frozen crust back into your pie dish, fill ‘er up, and bake. You can also freeze the crust in a disposable pie tin, just be sure to wrap it well.
Either way, you can stack several frozen pie crusts easily without taking up much freezer space and have them ready-to-go at any time. As it should be. Now, go make Kate’s All-Butter Crust and thank me later. Or not. Just knowing that you’re eating better pies is thanks enough.

All-Butter Pie Crust
From Pie School: Lessons in Fruit, Flour and Butter by Kate Lebo
Makes 1 double crust
Ingredients
2½ cups flour
1 tablespoon sugar
1 teaspoon salt
1 cup (2 sticks) well-chilled unsalted butter
Directions
- Fill a spouted liquid measuring cup with about 1½ cups of water, plop in some ice cubes, and place it in the freezer while you prepare the next steps of the recipe. The idea is to have more water than you need for the recipe (which will probably use ½ cup or less) at a very cold temperature, not to actually freeze the water or use all 1½ cups in the dough.
- In a large bowl, mix the flour, sugar, and salt. Cut ½- to 1-tablespoon pieces of butter and drop them into the flour. Toss the fat with the flour to evenly distribute it.
- Position your hands palms up, fingers loosely curled. Scoop up flour and fat and rub it between your thumb and fingers, letting it fall back into the bowl after rubbing. Do this, reaching into the bottom and around the sides to incorporate all the flour into the fat, until the mixture is slightly yellow, slightly damp. It should be chunky—mostly pea-size with some almond- and cherry-size pieces. The smaller bits should resemble coarse cornmeal.
- Take the water out of the freezer. Pour it in a steady thin stream around the bowl for about 5 seconds. Toss to distribute the moisture. You’ll probably need to pour a little more water on and toss again. As you toss and the dough gets close to perfection, it will become a bit shaggy and slightly tacky to the touch. Press a small bit of the mixture together and toss it gently in the air. If it breaks apart when you catch it, add more water, toss to distribute the moisture, and test again. If the dough ball keeps its shape, it’s done. (When all is said and done, you’ll have added about ⅓ to ½ cup water.)
- With firm, brief pressure, gather the dough in 2 roughly equal balls (if one is larger, use that for the bottom crust). Quickly form the dough into thick disks using your palms and thumbs. Wrap the disks individually in plastic wrap. Refrigerate for an hour to 3 days before rolling.
Reprinted with permission.