My kids are obsessed with “gummies,” probably because I treat them like candy and rarely offer them up as a snack. So, yea, my fault. In order to appease their wishes for gummy-like fruit snacks, I decided to try making two-ingredient homemade fruit roll ups, a no added sugar and gluten-free treat that we can all feel good about. And you guys, I could not believe how easy it was! The hardest part was waiting for them to be ready — but the end result was well worth the patience.
Especially in this (fleeting) phase when I’m super motivated to keep things as healthy and homemade as possible for back to school.
Though, I swear these are so easy that I’ll still be making them in December — but yea, yea, ask me again then.
Related: Easy snacks for kids, hold the added sugar!

Before I came up with a plan for my homemade fruit roll-ups, I did a little research and stumbled upon the homemade fruit-roll ups recipe at Our Best Bites. Sara’s low-key approach and clever tips were really helpful for a first timer like me. If you can’t be in the house for a six hour stretch, pop over to her site for some other smart suggestions.
In the end, I used my oven (no dehydrator required) and decided not to add any sugar to keep my fruit leather as wholesome as possible.

How to make homemade fruit roll-ups: What you’ll need
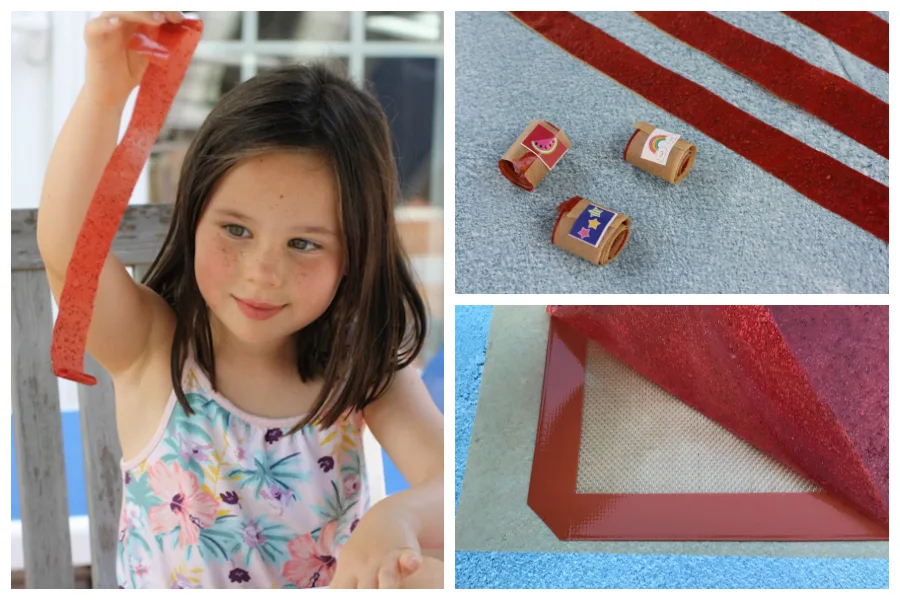
— A 13 x 8″ half baking sheet
— Silicone baking mat or good quality, oven-safe plastic wrap
— 3 to 4 cups strawberries (or other fruit), rinsed, trimmed, and halved
— 1 to 2 tablespoons fresh lemon juice, to taste
— Sweetener of choice, to taste (optional; honey, agave syrup, and sugar all work)
Related:A magical make-ahead breakfast that will make life easier and healthier.

How to make homemade fruit roll-ups: Instructions
1. Preheat oven to 150-170 degrees; 170 degrees will cook your fruit leather faster, but can dry it out faster, too, so you have to keep an eye on it. Prep a half baking sheet with a silicone mat or line with oven-safe plastic wrap; set aside.
2. Place fruit and lemon juice in a food processor and blend until very smooth.
3. Spread fruit puree on the prepped baking sheet and smooth with an offset spatula so that there is a thin, even layer. (If it’s too thick, it will take a lot longer to cook.) I ended up having a little extra fruit puree, which I added to a smoothie the next morning.
4. Place in pre-heated oven and bake until dry and no longer sticky, about 4-6 hours.
5. Carefully remove the entire piece of fruit leather and put the bottom (smooth) side onto parchment paper. Using kitchen shears (or, I strongly suggest a pizza cutter), cut into strips, roll up, and seal with stickers or, if the stickers give you trouble, either wrap with twine or stack the strips with parchment between each piece. Store in an airtight container (like a mason jar) for up to two weeks or in the freezer for up to three months.
* Pro-tip! If you or your kids don’t like seeds, strain the puree before step three. Easy breezy.


